
It’s Wednesday again, and time again for another Guest Geek post! I’ve got something a bit different for you this week. It’s a combination of something geeky, disgusting, and delicious, courtesy of fellow geek and author Tiffany Pitts. (Check out her book at the end for some humor-laced sci-fi. Also a cat!) She also happens to be an artist when it comes to baking, and I mean that “disgusting” in the previous sentence in a very positive way. But enough of my yammering. I’ll hand things over to her. Get ready for…
Xenomorph Cupcakes:
The Grossest Birthday Wish Ever!
For his 9th birthday, I made my kid a Minion-themed cake. It went over pretty well but that might be because of all the Twinkies.
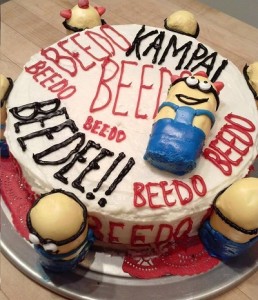
Twinkies were made for Minions.
In the 365 days since that cake he has been contriving a fool-proof plan to ensure birthday Twinkies happen again. He spent several weeks coming up with design ideas, finally settling on chestburster cupcakes as the clear and obvious solution. Together we figured out the mechanics and he very earnestly offered metabolic support wherever needed in the baking process. The resulting product turned out to be exactly what he wanted and completely disgusting.

SO GROSS.
I apologize to those of you with weak stomachs. These are the brain-child of a 10 year old boy with a strong desire for Hostess Snack cakes and frosting. Everyone in this house loves frosting. Especially the dog.
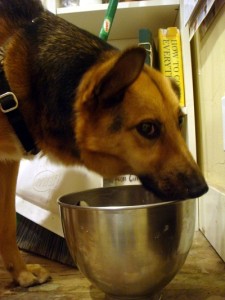
I AM PRE-WASHING THE FROSTING BOWL. PLEASE STAND BACK.
If you find yourself in need of some very gross but somewhat realistic looking chestburster cupcakes, I have put together this how-to protocol. Although this recipe is for 8 cupcakes, realistically you may only end up with 6 so be patient. They aren’t easy!
As for tools, having a pair of quality forceps will come in handy but even light duty tweezers will do in a pinch. You’re also going to need 8 wide-mouthed mason jar bands, bamboo skewers, large ziplock bags, a clean paint brush, a turkey baster, a set of kitchen shears and enough clear freezer space to hold a cookie sheet.
To get started! Assemble these ingredients:
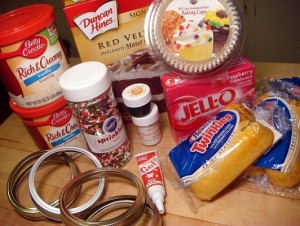
Not pictured: all the rest of the Twinkies. You will need 8.
I don’t have an over-large cupcake pan so I used what I had: two 9×13 cake pans and some wide-mouthed jar bands.
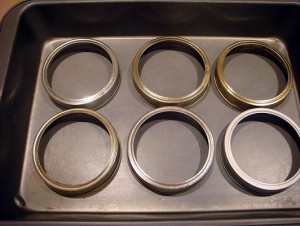
Even though only six are pictured here, you will make 8 huge cupcakes.
Use TWO cupcake liners per band. This will help keep overflow from making everything stupid looking.
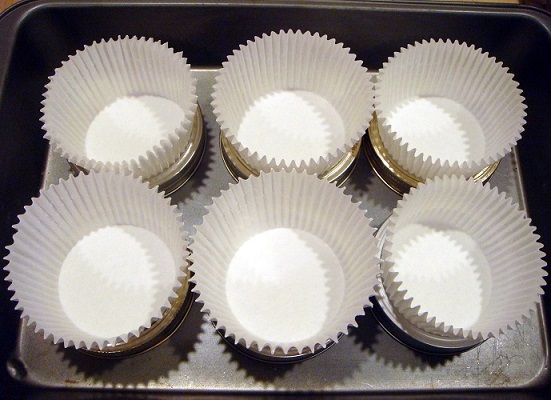
Set them up like so. Again, you will need 8.
Following the recipe on the back of the box, mix up your cake and portion it out evenly. You can use an overlarge pastry bag or a ziplock bag to portion the mix out between 8 liners without spilling.
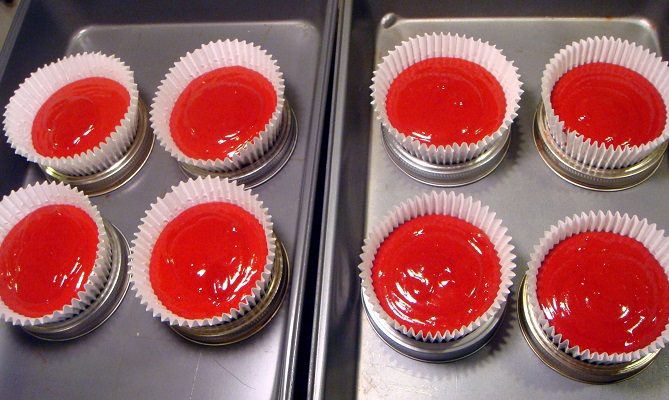
See! I told you there were 8.
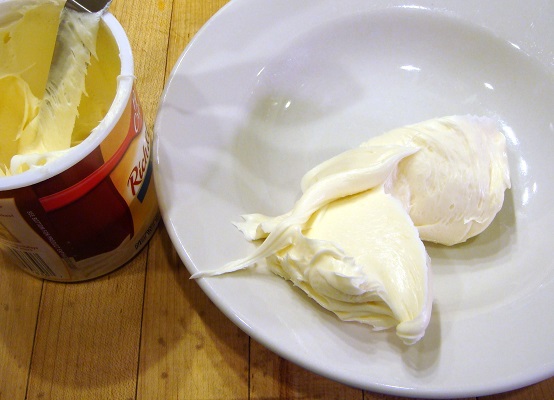
Now bake those puppies up! You will need to bake longer than the small cupcake requires, 20-26 minutes or even more depending on your oven. While you wait, start tinting the frosting. I used some variant of store-bought vanilla frosting and gel food coloring – mainly because that’s what I had. You can use what you like but you’re aiming for sort of pinky-nude. Here is what I used:
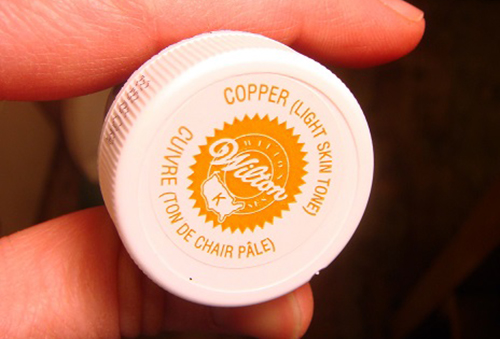
Start with a tiny bit and work your way up. You’re aiming for a pinky-nude.
Blend the frosting until it is evenly colored then divide it up for use: ¼ of it into a quart-sized ziplock bag, the rest into a microwavable 2-cup liquid measuring cup.
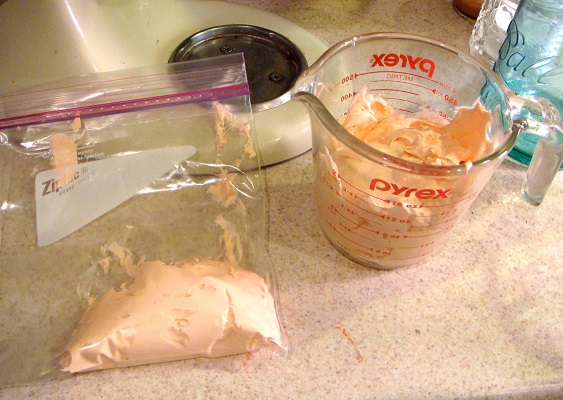
Put the ziplock aside in a cooler area. Do NOT put it in fridge. You don’t want it that cold.
Now your cupcakes are done and you’re going to be disappointed because some of them will have spilled all over the pan. Don’t worry, that’s what the extra liners are for.
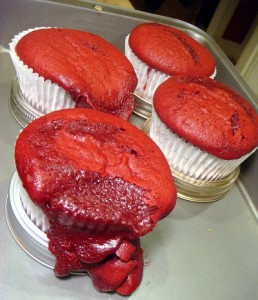
You could just use less cake mix in each liner but let’s not get crazy here.
Pick off the overspill and remove the extra lining.

Now is a good time to start a ‘scraps of cake that you are allowed to eat without fear of me whacking you with a spatula’ bowl.
Using your kitchen shears, trim up the sides of the cupcakes. And set them aside to cool.
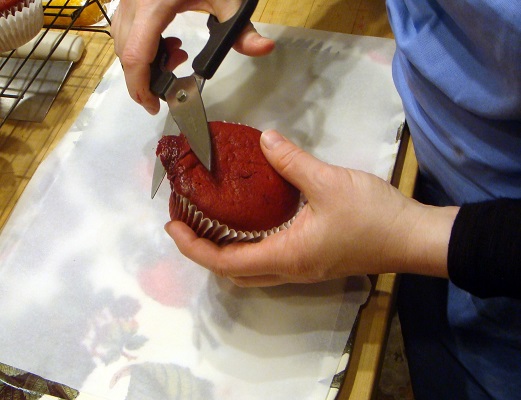
Don’t cut too much off, you just need to even them up.
Now comes the Twinkie part. First and most importantly, you will need freezer space to put an entire cookie sheet or low-sided tray. Make sure you have enough clear freezer space to set the tray in flat with the Twinkies standing on end. It’s difficult to rearrange freezer space once you start. Line your tray with waxed paper or parchment.
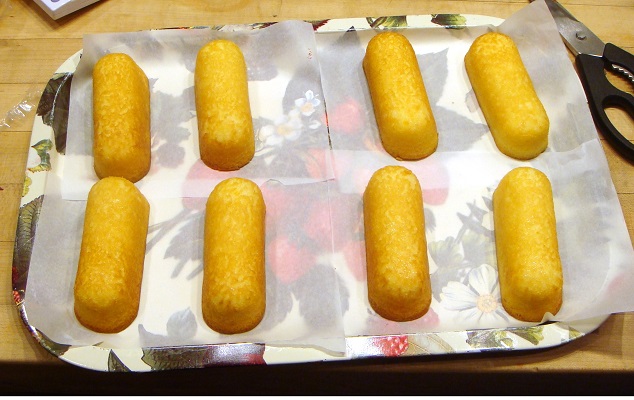
Now open those Twinkies!
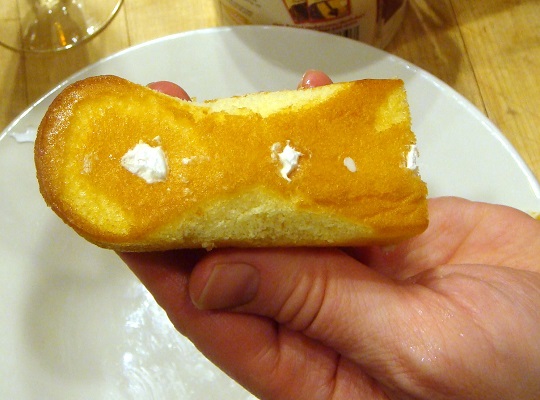
Using a serrated knife, cut off one end of each Twinkie. Make sure it’s a flat cut so they can stand upright.

Officer Pre-Wash checking in on scraps availability.
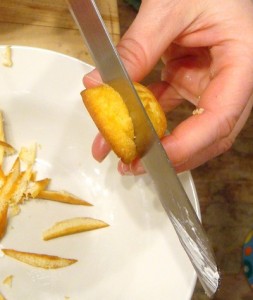
With your kitchen scissors, trim off a divot of cake from each side.
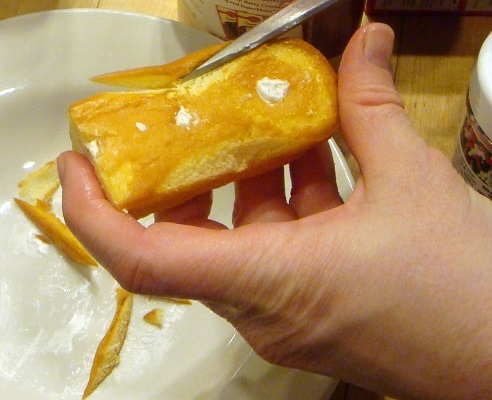
It helps if you make two cuts, one from each end toward the middle.
They should look like this.
Now cut a divot out of the rounded end of the Twinkie.
Try not to cut your finger like I did.
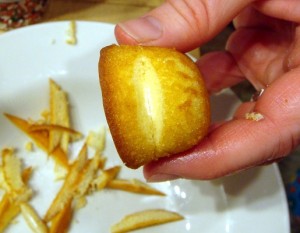
This will be the mouth.
When you have all 8 trimmed up, stick them in the freezer and let them cool for 5 minutes before preparing the frosting. Do not remove them from the freezer until you’ve got the frosting ready to go.
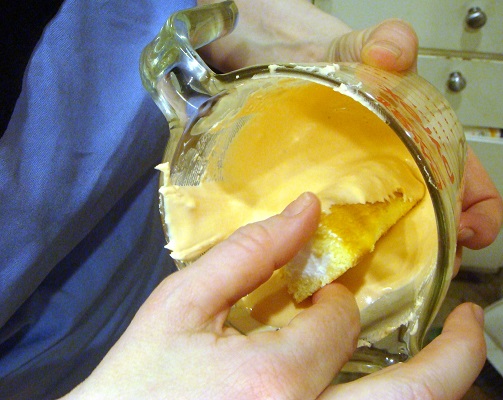
Heat the measuring cup full of tinted frosting in the microwave for 10 seconds. Stir the warmed frosting. If it has reached the consistency of a thin-ish cake batter, you’re ready to move on to the next step. If not, warm for 10 more seconds and check consistency again. Depending on your microwave oven, you may have to go another 10 -20 seconds but do not warm for more than 10 seconds at a time. It is very easy to overheat.
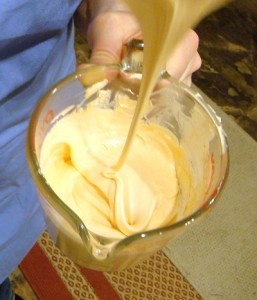
You want your frosting to look like this.
Dip each Twinkie in the melted frosting. Cover as much of it as you can and set it upright on the tray so that the frosting drips downward. You may have to go back and re-warm the frosting once or twice since it will cool fast. Once they are all dipped and covered, pop them back in the freezer for 5 more minutes.
This part is messy. Officer Pre-Wash likes this step very much.
As they cool for another 5 minutes, find that ziplock bag full of frosting. Cut 2-3 mm off the corner to make a decorating bag. Get your Twinkies out of the freezer and carefully run a beaded line of frosting down both sides where you cut the divots. Make another squiggle of frosting down the middle of the flat side—the ‘underside’—of each chestburster. Cut the tray lining if you need more freedom of movement. I suggest starting with the same Twinkie each time – consider it a practice Twinkie.
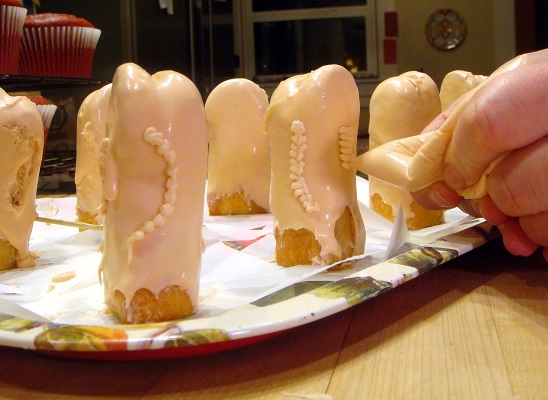
Don’t worry if they aren’t perfect. They’re just going to get grosser.
Freeze them again for another 5-7 minutes. Do not freeze them too long or they will turn mushy. While you wait, make up the contrast wash. For this I used black powdered food colorant and about a tablespoon of water.
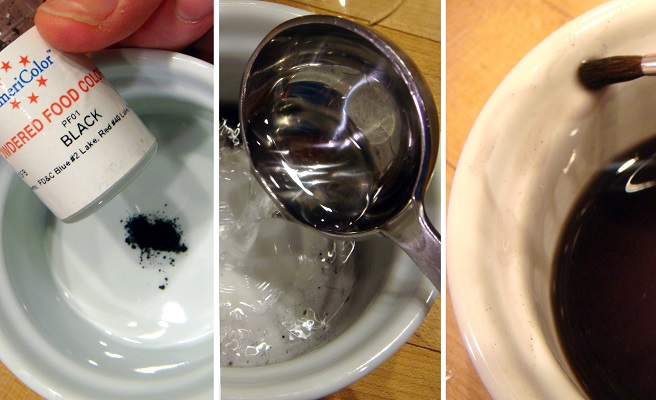
The last picture shows you the opacity you’re looking for.
Get your Twinkies out of the freezer and brush over the frosting ‘ribs’ with the contrast wash. At this point you may find some of your Twinkies listing to the side. Now is the time to bust out those bamboo skewers and shore up the leaning ones. You are going to trim the lower inch or so from them before they go onto the cupcakes so you have a little room there.
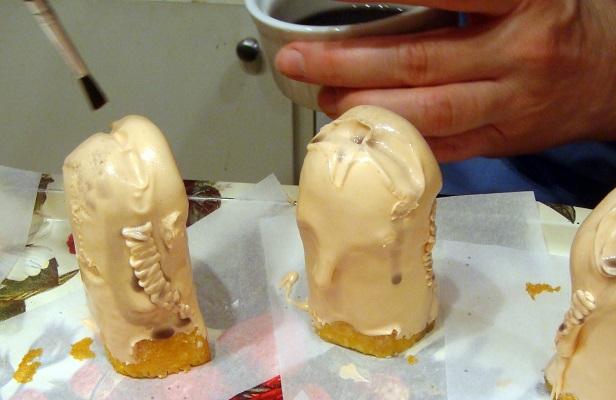
Contrast wash makes all the gross parts stand out better.
Freeze your Twinkies for another 5 minutes. While you wait, make the Jell-O. Using a cup of boiling water and mix until it’s dissolved. Next add about a cup of ice and mix until the ice melts. When the whole mess is cool to the touch, go get your chestbursters out of the freezer and baste them in the mix.
Don’t put too much on. This is only the first Jell-O wash.
While you’re freezing again, frost the cupcakes. Start by blooping about 1/3 of a can of frosting into a shallow bowl and heating it up for 10 seconds in the microwave.
Just like last time. Now you’re a pro.
Frost the cupcakes by dipping and twisting them. This will give you an even coverage without any lines. Once they’re all done, set them aside to dry/cool.
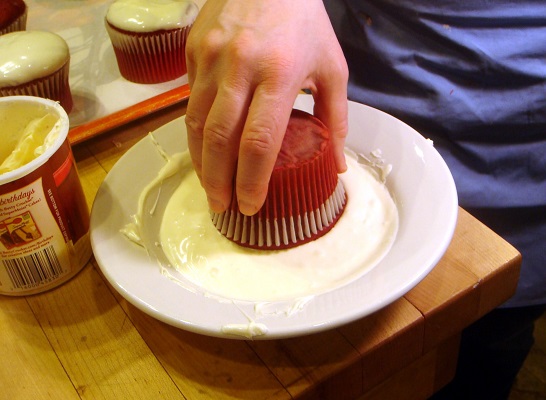
Also, it’s pretty fun.
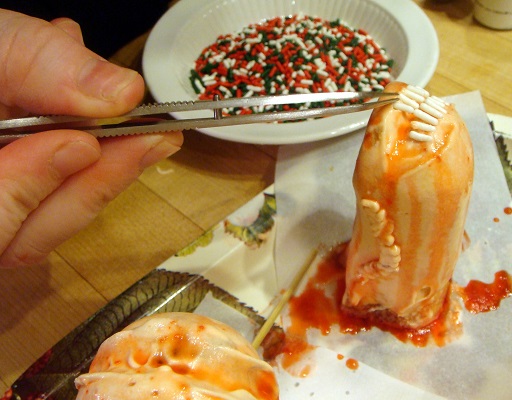
Now is the time when you’re going to want to get a beer or something because you are going to curse a lot. Go get your forceps, dump the sprinkles in a dish and start lining them up along the mouths. Use the straightest white sprinkles you can find. Longer ones in the middle and tapered to short ones nears the corners. Again, start with the same Twinkie you’ve been starting with on all these steps.
Once you’re done, give them a second, light Jell-O wash and put them back in the freezer for about 15 minutes this time.
This part is a royal pain in the ass. Sorry.
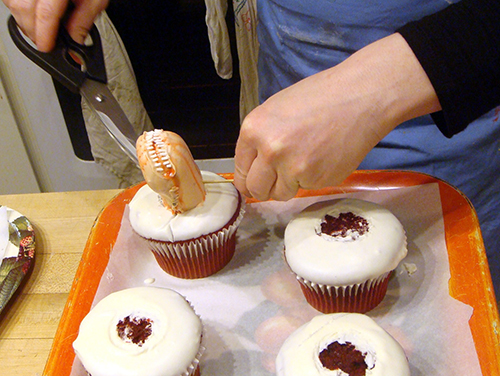
The cupcakes should be dried enough by now to assemble. I used a flat surface to pull up a small hole in the middle of each cupcake, in order to ‘sink’ the chestburster into the frosting. I’m not convinced you need this step so if you’d rather try it without, go for it. Let me know what happens.

I used a 1/8 cup measure.
At this point, the chestbursters will be frozen to the tray. Freezing for a longer period this time will make it easier to cut them off evenly at the bottom (where the decorated part begins) and place them on the cupcakes. I used my kitchen shears but you could probably use a sharp knife or unflavored dental floss. Whatever works for you. This part is not easy. Start with your practice Twinkie. You will drop one. Don’t worry.
This is, by far, the most stressful step in the entire endeavor.
You did it! You got them assembled! Take a minute and congratulate yourself. That was difficult. Now use the gel frosting to line the transition between Twinkie and cupcake.
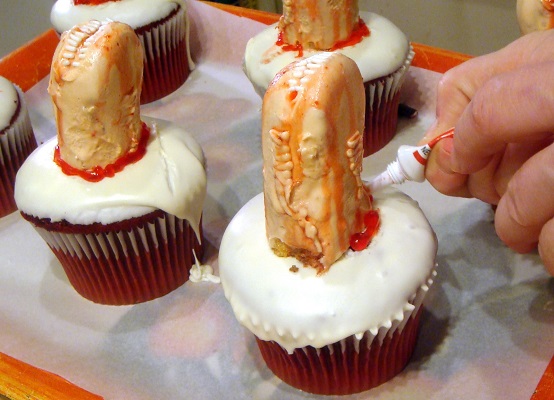
You’re almost done. Hang in there.
Touch up! About this time you’re probably looking at them thinking “I’m never going to eat these.” But they’re not perfectly gross yet so grab your Ziplock baggie of frosting and make any last minute touch ups that you find necessary.
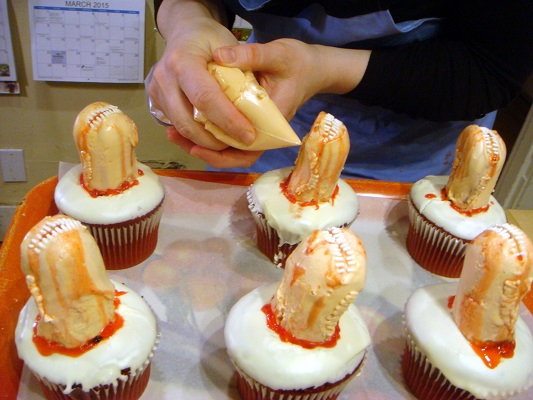
MOAR FROSTING CARTILAGE!
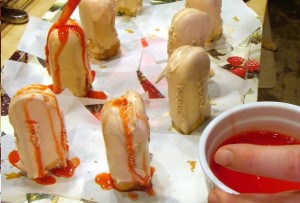
One last Jell-O wash! By this time, your Jell-O should be setting up. That’s good. Break it up into smaller chunks using the turkey baster, you may even have to microwave it for 5 seconds or so. You need it liquid enough to pour over the cupcakes but lumpy enough to look thoroughly disgusting. Do not put too much on or you risk making the bases soggy enough to fall over.
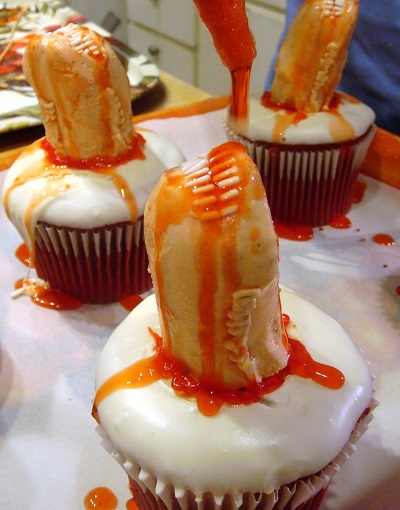
Now post a picture of them on line because you did it! You’re amazing!
Tiffany Pitts
ABOUT THE GEEK

 Tiffany Pitts is the author of Double Blind, a humorous Sci-Fi-ish adventure. You can follow more of her adventures on Facebook or on Twitter. Find more of her writing at snickerpants.com.
[…] it out! I’m over at Mike Munz’s website makin’ Xenomorph cupcakes for […]